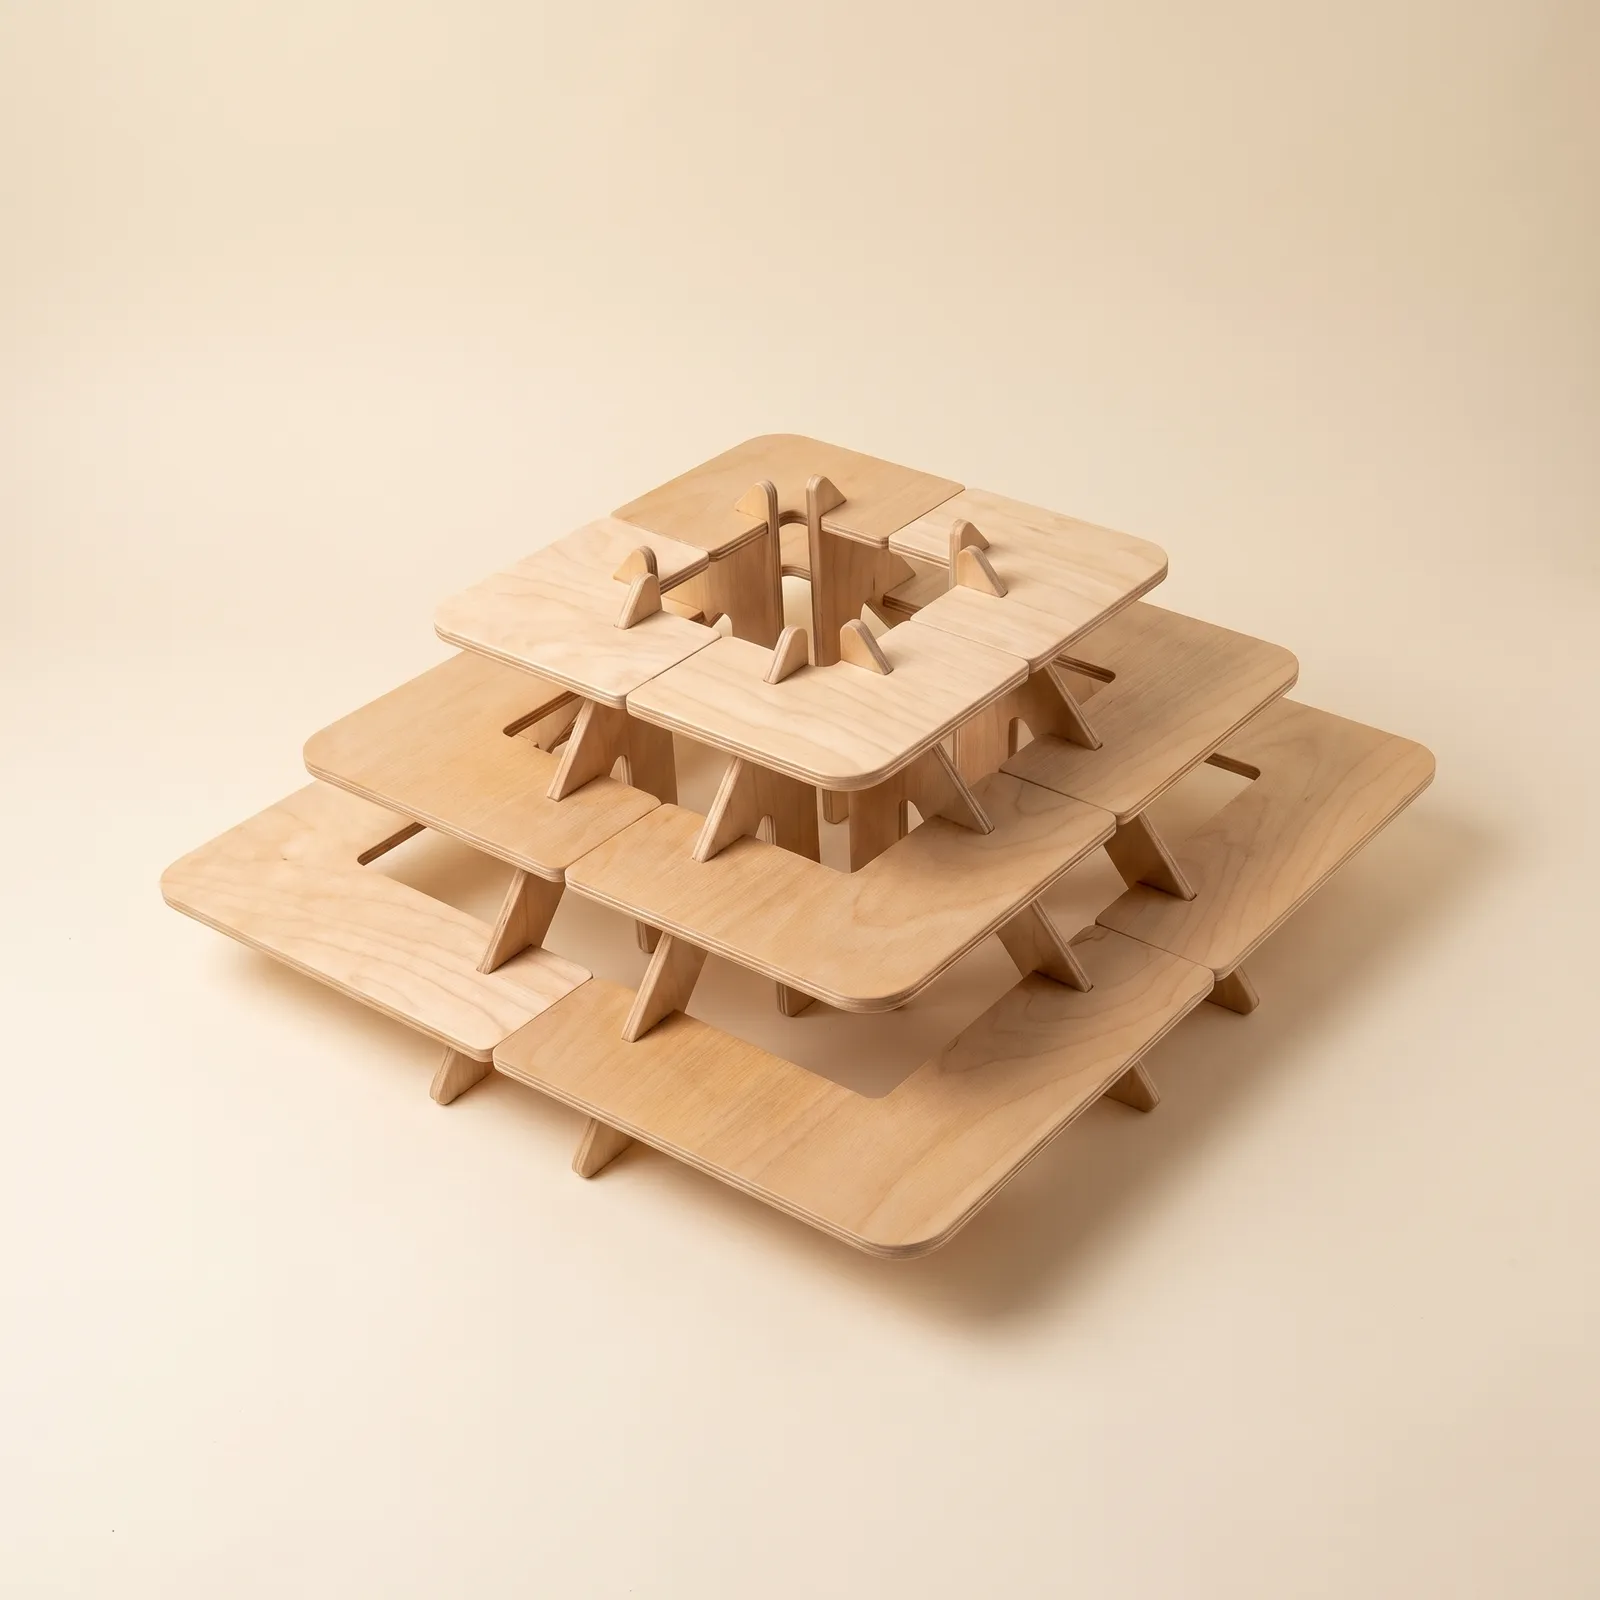
Project:
Corner-Fit Modular 3-Tier Display Stand Plans (Combinable with Linear Stands)
Package:
3 CNC Cut Files (SVG, DXF, DWG) + 2 PDF Guides (Imperial and Metric)
Laser/CNC-Ready Cut Files with a 7-Page PDF Guide (Imperial and Metric) Containing Dimensioned Drawings, Joint and Material Notes
What This Estimate Covers
Plywood Panel
1 sheet of plywood, 2×4 ft (61 × 122 cm), labeled 1/2" (12.7 mm) with an actual thickness of 0.453" (11.5 mm) — all five parts, the 3 L shelves and 2 shelf holders, come out of a single sheet. This estimate is based on the prefinished maple plywood project panel the guide references (Columbia Forest Products PureBond Prefinished Maple); it needs no paint or varnish. Because the stand is designed to be joined only by interlocking joints, without glue, nails, or screws, no material is needed beyond the sheet. If you choose birch plywood, the price may vary.
Sandpaper (Optional)
180–220 grit sandpaper and a flat sanding block; used only to soften the cut edges and to lightly open a notch that feels tight during the slot check. Not included in the estimate because it's a low-cost consumable.
Paint/Varnish (Optional)
Since the reference sheet is prefinished, no paint or varnish is needed. If you like, you can brush a thin coat of water-based varnish onto the cut edges only; don't paint inside the slots. Not included in the estimate because it's a matter of preference.
CNC/Laser Cutting Labor
If you have the cutting done by a shop, labor pricing varies significantly between local providers, so it's not included in this estimate.
it was great to make
Jun 8, 2026 · Charles
I did the jigsaw method. Easy to read measurements and diagram to draw out your own pattern.
Feb 19, 2026 · chickpeastudios
Great product easy to use
Nov 29, 2025 · Luan
Great customer service, thank you Simeh!
Sep 1, 2025 · Christina
Excellent customer service thankyou for support with my order
May 21, 2025 · Jeanette H*
it was great to make
Jun 8, 2026 · Charles
I did the jigsaw method. Easy to read measurements and diagram to draw out your own pattern.
Feb 19, 2026 · chickpeastudios
Great product easy to use
Nov 29, 2025 · Luan
Great customer service, thank you Simeh!
Sep 1, 2025 · Christina
Excellent customer service thankyou for support with my order
May 21, 2025 · Jeanette H*
I designed this project to make use of the spot a straight stand leaves empty: the corner. Each of the three shelves is an "L" that turns through 90°: the shelf has two arms, each 6" (15.2 cm) wide, and these arms meet at the corner. The shelves get smaller as they rise; their side lengths, bottom to top, are 19-3/4", 15-1/8", and 11" (50.2, 38.4, and 27.9 cm). The two slanted plates I call shelf holders, as the guide does, stand at right angles to each other, and each one fits into one arm of each of the three shelves. The stand occupies an area of 19-3/4" × 19-3/4" (50.2 × 50.2 cm) and rises to a height of 17-1/8" (43.5 cm).
A multi-purpose stand: I didn't design this stand for a single job. The same L shelves work as well for presenting light sweets such as cupcakes, cookies, and macarons as they do as a display stand when you're selling products: jewelry, small gifts, small handmade items, or counter items such as business cards and price tags can be arranged tier by tier. Because the shelves turn at the corner, the items face two directions at once; at a fair corner where two aisles meet, or on an L-shaped counter, customers can see the stand from both sides. The usage details are in the Capacity and Layout block.
How it sits in the corner: The arm ends of the three shelves finish flush on both sides, and the holders don't project past that line. So you can place the stand in the corner of a room with the arm ends reaching the two walls; the tiers rise toward the corner and the display faces the room. It sits the same way in the corner of a table or counter. The third use is to go next to a linear stand and form a corner turn itself: its arms are the same width and at the same height as the linear stand's shelves (Modular Use block).
Why stepped: Each shelf starts behind the one below it and covers only a strip along the inner edge of the shelf below, 1-3/8"–1-7/8" (3.5–4.8 cm) wide. On the outer side of every tier, a strip more than 4" (10.2 cm) wide is left open on top; you don't have to reach under the upper shelf to see and take the items below.
Why the corner is empty: I placed the holders near the end of each arm, 3-1/2" (8.9 cm) in from the arm end. No part stands in the elbow zone where the shelf's two arms meet; the corner of the L is the stand's widest unobstructed surface on every tier and the most eye-catching spot from the front. The three shelves have a total surface of about 3.05 sq ft (0.28 m²).
How it stays up: The load rides on the interlocking joints, not on screws or nails. The notch in each of a shelf's two arms fits into the slot of a holder; the shelf's weight travels from the lower edge of the slot into the holder, and along the holder down to the table. Because the two holders stand at right angles to each other, one holder's base resists swaying in one direction and the other's resists swaying at right angles to it; the three shelves tie the two holders together. In my own build, when I put items on the shelves, the corner included, the stand held its balance.
Why glue-free: All five parts come out of a single 2×4 ft (61 × 122 cm) sheet of plywood and are joined to each other only by interlocking joints; there's no glue, nail, screw, or miter cut. The stand sets up in seconds and comes apart into five flat parts: you can take it to a fair, a market, or a celebration table as a flat package and set it up on site, then take it apart again when you're done.
Once assembled, the structure has an outside dimension of 19-3/4" × 19-3/4" (50.2 × 50.2 cm) and a total height of 17-1/8" (43.5 cm).
The total height runs to the top of the holders; the holders rise 1-5/8" (4.1 cm) above the top shelf. If you're planning to fit the stand under a shelf or cabinet, work with 17-1/8" (43.5 cm).
All three shelves are L-shaped with arms 6" (15.2 cm) wide; what sets them apart is their side length. The side length is the measurement from the rounded outer corner of the shelf to the end of the arm. Bottom to top:
- 1st shelf (bottom): 19-3/4" (50.2 cm)
- 2nd shelf: 15-1/8" (38.4 cm)
- 3rd shelf (top): 11" (27.9 cm)
Between the two arms of the L, at the inside corner, a square inner gap is left: 13-3/4" × 13-3/4" (34.9 × 34.9 cm) on tier 1, 9-1/8" × 9-1/8" (23.2 × 23.2 cm) on tier 2, 5" × 5" (12.7 × 12.7 cm) on tier 3. The rear parts of the holders stand in this gap; it isn't shelf surface.
The top faces of the shelves sit 4-1/2", 10", and 15-1/2" (11.4, 25.4, and 39.4 cm) above the table. There is 5" (12.7 cm) of clear height between two shelves; under the bottom shelf, 4" (10.2 cm) of space is left down to the table. In the guide the shelves are drawn with a thickness of 1/2" (12.7 mm).
The two holders are at right angles to each other and each sits 3-1/2" (8.9 cm) in from the end of its arm. Their bases that rest on the table are 14-1/2" (36.8 cm) long and end just behind the outer edge of the bottom shelf. The arm ends of the three shelves are flush on both sides.
The three shelves have a total surface of about 3.05 sq ft (0.28 m²); the largest share of this surface is on the 1st shelf.
Capacity: When a whole corner unit is filled with a single size of cupcake, it holds about 250 mini, 55 standard, or 40 large cupcakes. I calculated these figures from the dimensions of the three L shelves, placing the cupcakes on the shelves one by one. I define the sizes by the cupcake's bottom and top diameter:
- Mini: bottom diameter 3/4" (1.9 cm), top diameter 1-1/4" (3.2 cm)
- Standard: bottom diameter 2" (5.1 cm), top diameter 2-1/2" (6.4 cm)
- Large: bottom diameter 2" (5.1 cm), top diameter 3" (7.6 cm)
You can measure your own cupcake together with its liner to see which size it falls into. The figures are approximate; the count changes with the diameter of the paper liner and how tightly you space them. The figures are for a single unit: if you're using more than one unit together, multiply by the number of units (Modular Use block).
As a sales display: This stand was designed for product display as much as for cupcakes. At a fair, market, or craft stall you can arrange small items such as jewelry, small gifts, and handmade soap and candles tier by tier, together with business cards and price tags. Because the shelves turn at the corner, your items are visible from two different directions; when you put the stand at the corner of the counter, you present to customers coming from both sides at once. The 5" (12.7 cm) of clear height between the tiers is enough for small items; put a taller piece on the open top shelf or on the open outer strips of the tiers. I designed the shelves for light items; don't put bottles, full bowls, or heavy decor objects on them.
Height: The 5" (12.7 cm) of clear height between the tiers is comfortable for cupcakes: by my calculation, even above a large cupcake 3-1/2" (8.9 cm) tall, about 1-1/2" (3.8 cm) of clearance is left. What's more, the upper shelf covers only the inner-edge strip of the one below; the outer strip of tier 1 is 4-5/8" (11.7 cm) wide and that of tier 2 is 4-1/8" (10.5 cm), and both are completely open on top.
My layout suggestions:
- Arrange the arms in two rows. The arms, 6" (15.2 cm) wide, take two rows of standard or large cupcakes, or four rows of minis.
- Put your showpieces in the corner. The elbow zone where the shelf's two arms meet is unobstructed and the most visible spot from the front; it's for pieces with name decorations, candles, or anything else you want to stand out.
- Account for where the holders are. On each arm, 3-1/2" (8.9 cm) in from the end, the holder plate rises from the inner edge of the shelf up to the next tier; no cupcake goes on that thin line, so arrange the rows on either side of it accordingly.
- Don't put heavy items at the arm ends. The 3-1/2" (8.9 cm) ends outside the holders are for light items.
- Give the fullest arrangement to the bottom tier. The largest surface is on the 1st shelf; keeping the weight low also helps the stand's balance.
- Don't put cupcakes directly on the wood surface; arrange them in their paper liners or on small serving plates (details in the Surface, Edges and Food Contact block).
The units are independent of one another: You can use this corner unit on its own, or set it up together with other corner units and with the linear stands in the same family. No part connects the units to one another; each unit stands on its own two holders, and you place them side by side, back to back, or in a U or square layout to suit your needs. You don't need to cut anything new to set up one layout at one fair and a different one at another event.
Why they fit together: I designed the corner unit to the same system of measurements as the linear stand. The arm width, 6" (15.2 cm), the shelf heights, and the holder profile are the same on both products. When the end of the corner arm meets the end of the linear stand's shelf, the front and back edges of the two shelves line up on all three tiers and the shelves carry on like one unbroken strip. The L shelf is symmetric about its own diagonal and the two holders are exactly identical; that's why the corner unit has no right or left version — you rotate the same unit and use it in every corner.
Example layouts:
- 2 corner units side by side: When you bring the arm ends together, the shelves form a U-shaped area; about 39-1/2" × 19-3/4" (100.3 × 50.2 cm) on tier 1.
- 4 corner units side by side and back to back: The four units form a square ring and turn into a large, tiered table; about 39-1/2" × 39-1/2" (100.3 × 100.3 cm) on tier 1, with the holders staying in the gap in the middle. The parts of the four units come out of a single 4×8 ft (122 × 244 cm) sheet.
- 1 corner unit + 1 linear stand: The corner unit meets the end of the linear stand and turns the shelves 90°; the result is an L-shaped display that goes around the corner of the counter.
- 2 corner units + 1 linear stand: With a corner unit at each end of the linear stand, a U-shaped structure results; about 64-1/2" × 19-3/4" (163.8 × 50.2 cm). The Modular 3-Tier Display Stand project in the family is exactly this layout.
Capacity in a combined layout: I give the capacity per unit; in a combined layout, multiply the figure I give for the corner unit by the number of corner units you use, and add the linear stand's capacity from its own page.
Line the units up on a flat surface, with the arm ends touching. Because they aren't connected to one another, a bump on a crowded counter can make them slip against each other; check the alignment of the shelf ends after setting up and during the day. For the linear stand, see the Linear 3-Tier Display Stand project; for the layout where straight and corner units are set up together, see the Modular 3-Tier Display Stand project.
3 CNC files in SVG, DXF, and DWG format: I provide the same cut package in three formats, so whichever CAD or CNC program you work with, there's a format in the package that you can open. You don't need paid software to inspect the files: LibreCAD (free, open-source) and QCAD (free community edition), both of which run on Windows and Mac, are enough; if you want a Windows-only option, Autodesk's free viewer DWG TrueView is available. If you're having the parts CNC- or laser-cut, you don't have to open the file yourself — you can hand it straight to the shop. All five parts are laid out in the file within a single 24" × 48" (61 × 122 cm) sheet area.
2 PDF guides (imperial and metric): I provide the same guide as two separate files, one with inch dimensions and one with millimeter dimensions; print whichever measurement system you work in. The guides are in English and explained through drawings; the imperial guide is 7 pages. It includes a perspective diagram showing the parts by number, front and side views giving the shelf lengths and tier heights, a dimensioned top view of the three L shelves (notch detail included), a dimensioned drawing of the shelf holder (slope angle included), and a materials page.
I prepared the guide for A3; you can also print it scaled down to A4 or US Letter. Since every dimension is written out in numbers on the page, and the guide has no 1:1 scale template, scaling down doesn't spoil any measurement.
The guide has no separate assembly page, and it doesn't need one: the stand goes up in seconds with interlocking joints; I've described setting it up on this page, in the Assembly and Disassembly block. There's no separate cut list table or sheet layout page either; the sheet layout is in the CNC file itself, and the full list of the 5 parts is in the Panel Count and Cut List block in the Materials section. There's no printable template for hand-cutting either: you mark the dimensions from the guide onto the sheet and cut (Two Build Options block).
What decides your material on this project isn't the wood species but the thickness. I drew the slots in the holders and the notches in the shelves 1/2" (12.7 mm) wide; the design was prepared for plywood labeled 1/2". If the sheet is thicker than this width, the shelves won't go into the slots; if it's much thinner, they sit loose in the slot.
Nominal versus actual thickness: The thickness on a plywood label and the sheet's real thickness are often different. The sheet I used as the reference on the guide's materials page is sold in the US under a "1/2 inch" (12.7 mm) label, but its actual thickness is about 0.453" (11.5 mm). With this sheet, about 1.2 mm of clearance is left in every joint; the shelves go into the slots without being forced. So trust the measurement, not the label: measure the sheet with calipers at several points before you buy it.
In my own build: I built the stand with the dimensions in the guide, using a panel labeled 1/2"; the parts seated in place, and no adjustment was needed in the file or the slots.
Recommended: plywood measuring 11.5–12.7 mm in actual thickness. I recommend two product groups:
- Prefinished maple plywood — This is the product I used as the reference on the guide's materials page: Columbia Forest Products PureBond Prefinished Maple Project Panel, 1/2" × 2 × 4 ft (12.7 mm × 61 × 122 cm). It's a hardwood plywood made for interior use, with a maple veneer face; it's sold with the surface sanded and coated with a clear protective layer. Since it needs no paint or varnish, it's my first choice for this stand.
- Birch plywood — Its plies are tight and free of gaps, so the cut edge comes out clean. Where plywood is sold by millimeter thickness (Europe and elsewhere), look for a sheet labeled 12 mm, and be sure to measure its actual thickness. If the sheet is uncoated, you'll need to protect its surface yourself (Surface, Edges and Food Contact block).
Avoid:
- A sheet with an actual thickness above 12.7 mm, for example plywood labeled 5/8" (15.9 mm). The shelves won't go into the slots; the thin section beside a slot that's forced can crack.
- A sheet with an actual thickness of 10 mm or less, for example plywood labeled 3/8" (9.5 mm). The shelves sit loose in the slots with a gap of about 3 mm; since on this stand it's the joint itself, not glue, that holds the shelves, they play and don't sit level. A thin sheet also flexes more under load on the wide L shelves.
I wrote in the guide that sheets between 3/8" and 5/8" (9.5–15.9 mm) can also be used; that holds on the condition that the slots are redrawn for the sheet. If you want to use the file as is, stay within the recommended range above.
Whichever sheet you buy, fit each shelf into the holders once after cutting. Sand a tight notch lightly on its inside edge; don't force it. If the thickness you measure falls outside the 11.5–12.7 mm range, message me on Etsy before you start cutting; let's adapt the file together.
All the parts come out of a single 2×4 ft (61 × 122 cm) sheet. The layout in the cut file was prepared for an area of 24" × 48" (61 × 121.9 cm). If you buy a 4×8 ft (122 × 244 cm) sheet, the parts of four corner units come out of it; if you're thinking of building a square ring from four units (Modular Use block), that calculation will come in handy.
The layout has spare room: about 52% of the sheet turns into parts. Because the shelves are L-shaped, they're laid out in the file with their arms nested together; the holders sit side by side at one end of the sheet.
The 5 parts in the cut file (all from a sheet labeled 1/2" (12.7 mm)):
- 1st shelf (1 piece): L, side length 19-3/4" (50.2 cm), arm width 6" (15.2 cm). One notch in each arm that fits into a holder.
- 2nd shelf (1 piece): L, side length 15-1/8" (38.4 cm), arm width 6" (15.2 cm). One notch in each arm.
- 3rd shelf (1 piece): L, side length 11" (27.9 cm), arm width 6" (15.2 cm). One notch in each arm.
- Shelf holder (2 pieces): 17-1/8" × 14-1/2" (43.5 × 36.8 cm) slanted "Λ"-shaped plate. Its slanted edge makes a 40° angle with the vertical; on this edge there are three slots that the three shelves fit into. The two holders are exactly identical; there's no left and right.
The outer corner of the shelves is rounded with a 2" (5.1 cm) radius, and their other corners and the corners of the holders with a 1/2" (1.3 cm) radius. The dimensions of the notches and slots are in the CNC file and in the guide's drawings.
Because the three shelves differ in length, they're hard to mix up; even so, write the numbers 1 to 3 on their undersides in pencil the moment you cut them. Which shelf goes on which tier is covered in the Identifying the Parts and Checking the Slots block.
No glue, nails, or screws. I designed this stand to be glue-free, so it can be taken apart and set up again. The five parts are joined to one another only by halving joints: the notch in the shelf's arm fits into the holder's slot, and the two parts lock each other in place. These joints both carry the load and hold the shelves in place.
Why glue-free: Setup is tool-free and takes seconds; the stand comes apart into five flat parts and is carried as a flat package. You take it to a fair, a market stall, or a celebration table, set it up on site, and take it apart when you're done. It helps with modular use too: you can set up the same units on their own one day and together with other units in a different layout another day.
Glue is optional: If you want to use the stand as a solid piece that can't be taken apart, you can apply wood glue to the notches; once the glue is applied, the stand can't be taken apart again.
Don't drive nails or screws into the thin sections beside the slots. The panel can crack at the edge; and a stand that's been nailed or screwed can no longer be taken apart.
Clamps and waiting: Not needed. The moment the shelves are seated in their slots, the stand is ready to use.
Consumables: To clean up the edges and notch mouths after cutting, 180–220 grit sandpaper, a flat sanding block, and a pencil for numbering the shelves are enough.
This is an indoor tabletop stand. Since the reference sheet is sold prefinished, paint or varnish isn't required; after cutting, the stand is ready to use.
Cut edges: On the cut edges of the plywood the layer lines are left exposed; the prefinished coating is only on the faces of the sheet. You can leave the edges in their natural state, or brush just a thin coat of water-based varnish onto the edges alone (Sanding and Edge Finishing block).
If you still want to paint: Paint may not grip a prefinished surface well directly. Dull the surface with 220 grit sandpaper, then apply a bonding primer and a water-based acrylic furniture paint (acrylic enamel, cabinet paint). If you used an uncoated sheet such as birch, water-based polyurethane varnish protects pale wood without yellowing it; two thin coats in a matte or satin sheen are enough.
Don't paint inside the notches and slots. The thickness of the paint narrows the clearance in the joint, and each time the stand is taken apart and set up, the paint on the notch edge wears away. Before painting, cover these areas with masking tape, paint while the parts are separate, and remove the tape after the paint has dried.
Food contact: I'm not making a firm ruling on whether the wood, the sheet's prefinished coating, or a product you apply afterward is suitable for direct contact with food. Here is what I recommend:
- Arrange cupcakes in their paper liners or on small serving plates; don't put frosted items directly on the wood surface.
- For paint or varnish, choose a product that is labeled as suitable for food contact ("food safe" or "food contact").
- Don't settle for the surface feeling dry to the touch; wait for the full cure time stated on the label, and only then use the stand with food.
There are two ways to build this project, and which one you choose depends on what you have access to.
- CNC / laser cutting — Hand the SVG, DXF, or DWG file from the package to a CNC or laser shop. All five parts come out with the same precision; the narrow notches and slots and the slanted edges of the holders in particular are cut to the most accurate dimensions this way. If you're having it laser-cut, ask the shop beforehand whether its machine can cut 12 mm plywood cleanly.
- Cutting by hand with a jigsaw — Draw the dimensions from the guide onto the sheet yourself and cut them out. Every edge of the L shelves is straight; the only curves are the outer corner with a 2" (5.1 cm) radius and the small corner roundings with a 1/2" (1.3 cm) radius.
Four notes if you're cutting by hand:
- Shelf arms: The arm width is 6" (15.2 cm) on all three shelves. Cut the long straight edges with the jigsaw run against a straightedge batten; if the width of an arm varies from one end to the other, the edges won't line up when the shelves sit side by side with linear stands or other corner units.
- Outer corner: Draw the rounded outer corner of the shelves with a 2" (5.1 cm) radius; a compass or the rim of a container 4" (10.2 cm) in diameter will do the job. Round the other corners with a 1/2" (1.3 cm) radius.
- Shelf holders: The hardest part of the project; it has two slanted edges, the opening between the legs, and three slots. The angle of the slanted edge is written on the holder drawing in the guide: 40° from the vertical. Transfer the angle to the sheet with a protractor and make the cut against a straightedge batten. To get the two holders exactly identical, cut and true one first, then draw the second using it as a template.
- Notches and slots: Cut the two sides parallel up to the line, cut out the piece between at its base, and true the base with a file. Cut on the inside of the line and sneak up on the final size by sanding, test-fitting it with a shelf; in a narrow notch drawn to the sheet thickness, material that's been removed doesn't come back.
Number each shelf the moment you cut it; how to tell which shelf is which is in the Identifying the Parts and Checking the Slots block.
The four topics below are the ones that are hard to fix once the parts are cut. Read them before you start cutting, before you send the file to a shop.
1. Measure your sheet before cutting. The slots and notches were drawn for a sheet labeled 1/2" (12.7 mm). If you're taking your own sheet to the shop, measure its thickness with calipers and make sure it falls within the 11.5–12.7 mm range; if you'll use the shop's sheet, ask them the thickness. What happens with thicker and thinner sheets is covered in the Material Choice and Panel Thickness block.
2. Don't edit the file before having it cut. The notches of the shelves and the slots of the holders were dimensioned relative to each other; each shelf's notch was drawn for its own tier. Have it cut without changing the contours in the CNC file, and when cutting by hand, follow the dimensions in the guide exactly. On a notch that deviates from its dimension, the shelf won't seat fully on the holder.
3. Leave the kerf allowance on the correct side. A router bit or a laser beam removes some material over the line. There's no inner contour in this project: the notches, the slots, and the opening between the holder's legs are also part of the part's outer outline. Remind the shop that all contours should be cut on the outside of the line; a notch cut from the wrong side grows and the shelf sits loose in the slot.
4. Nothing beyond the cut file. This project has no miter cuts, holes, or nail positions; ask the shop only to cut the contours in the file. Once the parts are out, number the shelves 1 to 3 right away.
Identifying the parts on this stand is easy: the three shelves differ in length, and the two holders are exactly identical. The holders have no right or left; it makes no difference which one you put under which arm.
The rule for identifying the shelves:
- 1st shelf (bottom): The largest L, side length 19-3/4" (50.2 cm).
- 2nd shelf: The middle L, side length 15-1/8" (38.4 cm).
- 3rd shelf (top): The smallest L, side length 11" (27.9 cm).
Tell the shelves apart by this rule and by the part numbers in the guide, and write their numbers on their undersides in pencil; that way you find the right order at every setup without hunting for it.
Slot check: Before the first setup, fit each shelf into its own slots once and take it out again. When the shelf is pushed by hand, it should go in all the way without being forced. On a sheet labeled 1/2" (12.7 mm), a little clearance in the joint is normal; the design was prepared with this clearance. Lightly sand a tight notch on its inside edge with a flat block and try again; don't force the shelf in with a mallet.
Open the notch a little at a time. On this stand it's the joint itself, not glue, that holds the connection; in a notch that's opened too much, the shelf plays and the stand wobbles. Apply the sandpaper only to the cut edge of the notch and keep it off the shelf's prefinished face; the coating gets scratched and that area goes dull.
This stand doesn't have a long assembly: once the parts are cut, they fit together with interlocking joints in seconds; no tools or glue are needed. Follow the same sequence every time you set it up.
- Position the holders — Stand the two holders upright on a flat surface at right angles to each other: each goes under one arm of the L, 3-1/2" (8.9 cm) in from the arm end. The straight back edge of the holders should face the corner, that is, the inner-gap side; the slotted slanted edge should face outward.
- Start with the bottom shelf — Seat the 1st shelf so that the notches in its two arms land in the lowest slots of the two holders. Starting from the bottom is easier: the first shelf in place holds the two holders at the right angle and spacing, and the upper shelves find their slots easily.
- 2nd and 3rd shelves — In the same way, fit the 2nd shelf into the middle slots and the smallest, 3rd shelf into the top slots.
- Check — The shelves should be level and 5" (12.7 cm) of clear height should be left between tiers. The arm ends of the three shelves should be flush on both sides, and the holders should be 3-1/2" (8.9 cm) in from the end on each arm.
Disassembly: Do it in reverse order: first take the top shelf, the 3rd, out of its slots, then the 2nd and 1st, and then lay the holders down. Pack the parts flat, stacked in numerical order.
Push and pull the shelves straight when fitting and removing them. Prying a shelf at one arm or forcing it at an angle crushes the notch and slot edges; a crushed joint loosens over time and the shelf starts to play. Push or pull a stuck shelf with equal force at both arms, not with a mallet.
Don't sand the prefinished surface all over. The faces of the reference sheet are prefinished; sanding all over takes off this protective layer and dulls the surface. Use the sandpaper on the edges and on the points that feel tight during the slot check.
Ease the edges lightly: After cutting, soften the outer edges of the shelves and the arm ends with 180–220 grit sandpaper in a pass or two. That way the plywood edge splinters less, and cupcake liners and hands don't catch on the edge. The 2" (5.1 cm) radius outer corner of the shelves and the small corners with a 1/2" (1.3 cm) radius are already cut rounded; use sandpaper only to take off the cut marks. Take off any fine burrs left over from CNC cutting at this stage too.
Don't round over the insides of the notches and slots. These surfaces are what holds the shelf every time the stand is set up. Here, use sandpaper only at the point that felt tight during the slot check, with a flat block and a little at a time; keep the block inside the notch, because if it touches the shelf's prefinished face, the coating gets scratched.
Edge appearance: The layer lines on the cut edge stay exposed. You can leave them natural; if you want a more protected edge, brush a thin coat of water-based varnish onto the edges and protect the notch and slot edges with tape. The sequence I recommend: cut → number → sand the edges → slot check → (optional) edge varnish → assemble.
This stand's stability comes from its geometry. The guide doesn't give a load limit, so I'm not going to give you a carrying capacity in kilograms; instead I'll explain how the stand stays balanced and what you should watch for.
Two holders at right angles to each other press on the table. The base of each holder is 14-1/2" (36.8 cm) long and extends to just behind the outer edge of the bottom shelf. One holder's base resists swaying in one direction and the other's resists swaying at right angles to it; the three shelves tie the two together. In my own build, when I put items on the shelves, the corner included, the stand held its balance.
Even so, here is what you should watch for:
- A flat, solid surface: Because the stand rests on two thin bases, a thick, soft tablecloth or a folded piece of fabric can sink one of the bases, and the shelves sit tilted. If you use a cloth, make it flat and taut.
- Light items, weight low: I designed the shelves for light sweets and small sales items such as jewelry and small gifts; don't put bottles, full bowls, or heavy decor objects on them. Place the relatively heavy pieces on the bottom tier, close to the holders; don't put anything heavy on the 3-1/2" (8.9 cm) part of the arm ends that lies outside the holders.
- Away from the table edge: Don't place the stand at a table edge where guests, or customers in front of the counter, might bump it as they pass; set it at least a hand's width in from the edge. If you're using more than one unit, check their alignment during the day, because the units aren't connected to one another.
- Children: The bottom tier is at a height small children can reach, and the shelves aren't designed for climbing or hanging. At a celebration with a lot of children, keep the stand in your sight.
- Don't carry it loaded: Because the shelves sit glue-free, a shelf can slip out of its slot when the stand is lifted. Set the stand up in place empty, then arrange the cupcakes and items where it stands.
Cleaning: Wipe with a damp, well-wrung cloth, then dry with a dry cloth. Don't soak the stand in water, wash it under the tap, or put it in the dishwasher; plywood doesn't tolerate staying wet for long, and the plies can swell and the notches can lose their shape. Wipe off frosting or sugar stains before they dry; the uncoated cut edges soak up a stain more easily than the surface.
Transport: Taken apart, it breaks down into five flat parts; stacked up, by my calculation they make a package of about 19-3/4" × 19-3/4" × 2-1/2" (50.2 × 50.2 × 6.4 cm). You can carry it this way, in a thin box or bag, to a fair, a market, or a celebration table and set it up on site (how the shelves are fitted and removed is in the Assembly and Disassembly block). When stacking the parts, put a cloth or cardboard between them so the prefinished faces don't scratch one another.
Its outside dimensions when set up are 19-3/4" × 19-3/4" × 17-1/8" (50.2 × 50.2 × 43.5 cm). Because setup takes seconds, I recommend taking the stand apart when you move it rather than carrying it set up; a shelf that sits glue-free can slip out of its slot while being lifted.
Storage: Store the disassembled parts in a dry place, away from heat sources such as a radiator or direct sunlight, stacked flat on a level surface; thin plywood can warp if left leaning at an angle for a long time, and it moves slightly as moisture and temperature change. Keep it under a cover or in its box so it doesn't collect dust.
This stand is a load-bearing structure, so changing the size isn't just a matter of scaling the file up or down. Rescaling the CNC files in CAD software is technically possible, but the slots in the holders and the notches in the shelves were designed for a 1/2" (12.7 mm) sheet. If you scale the file up or down proportionally, those slots change too, but your sheet's thickness stays the same; the shelves either sit loose in the slot or won't go into it. When the scale changes, the shelf edges of the corner unit also won't line up with the shelves of the linear stands. If you want a different size, message me on Etsy before changing the scale; let's work out together which measurements need to stay fixed.
Yes — this is a standard, platform-wide Etsy feature. The download link doesn't expire; you can re-access your files anytime from the "Purchases and Reviews" page in your Etsy account, with no limit on how many times you download.
Of course — I make every plan myself, and you're welcome to reach out to me directly through Etsy with any question, before or after your purchase. I stand behind every design I share.
No — these files are for personal use only. Selling what you make from them, or using the design or files for any other commercial purpose, isn't included in this purchase.
I don't offer refunds once the files have been downloaded — this is standard practice given the nature of digital goods. That said, if you run into an actual problem with the files (won't open, something's missing), reach out and I'll help sort it out.
I recommend a sheet that measures 11.5–12.7 mm in actual thickness. The slots in the holders and the notches in the shelves are 1/2" (12.7 mm) wide; in my own build, with a panel labeled 1/2", the parts seated in place. Avoid a sheet with an actual thickness above 12.7 mm, for example 5/8" (15.9 mm) plywood: the shelves won't go into the slots. Avoid 10 mm and under as well, for example 3/8" (9.5 mm) plywood: the shelves sit loose in the slots; because the stand is glue-free, that gap lets the shelves play. The 3/8"–5/8" (9.5–15.9 mm) range in the guide holds on the condition that the slots are redrawn for the sheet. Measure your sheet with calipers and fit each shelf into its slots once after cutting. If the thickness you measure falls outside the 11.5–12.7 mm range, message me on Etsy before you start cutting; let's adapt the file together.
When a corner unit is filled with a single size of cupcake, it holds about 250 mini, 55 standard, or 40 large cupcakes. I calculated these figures from the shelf dimensions, placing the cupcakes one by one. I define the sizes by bottom and top diameter: mini 3/4" (1.9 cm) bottom, 1-1/4" (3.2 cm) top; standard 2" (5.1 cm) bottom, 2-1/2" (6.4 cm) top; large 2" (5.1 cm) bottom, 3" (7.6 cm) top. The count varies with the diameter of the cupcake liner and how closely you space them. The figures are for a single unit; if you're using more than one corner unit together, multiply by the number of units. There's 5" (12.7 cm) of clear height between the tiers and the outer strip of every tier is open on top; cupcakes with tall frosting fit too. The same shelves can also be used to display small items at a sales stall. Details are in the Capacity and Layout block.
Yes. I designed this stand to be multi-purpose: alongside cupcakes and light sweets, it also works as a display stand at a fair, market, or craft stall for jewelry, small gifts, small handmade items, and counter items such as business cards and price tags. Because the shelves turn at the corner, your items are visible from two directions; when you put the stand at the corner of the counter, you present to customers coming from both sides at once. For a wider display, you can set up more than one corner unit or linear stands side by side. The shelves are for light items; don't put bottles or heavy objects on them. Details are in the Capacity and Layout block.
I don't recommend it. I'm not making a firm ruling on direct food contact with the wood, with the sheet's prefinished coating, or with the paint or varnish you put on afterward; the safest way is to arrange the cupcakes in their paper liners or on small serving plates. If you're going to paint or varnish, choose a product whose label says it's suitable for food contact, and wait for the full cure time stated on the label. Details are in the Surface, Edges and Food Contact block.
Yes. I designed this stand to be glue-free: the shelves sit in the holders' slots by the interlocking fit alone, with no nails or screws. The stand sets up and comes apart in seconds; taken apart, five flat parts remain and they make a package of about 19-3/4" × 19-3/4" × 2-1/2" (50.2 × 50.2 × 6.4 cm). You can take it to a fair, a market, or a celebration table as a flat package and set it up on site. Push and pull the shelves straight when fitting and removing them; the edge of a joint that's forced at an angle is crushed and loosens over time. If you want to make the stand permanent, you can apply glue to the notches, but then it can never be taken apart again. Details are in the Assembly and Disassembly block.
Yes, I designed it for that. The arm ends of the three shelves finish flush on both sides and the holders don't project past that line; you can place the stand in the corner of a room with the arm ends reaching the two walls, or in the corner of a table or counter. The tiers rise toward the corner, and the display faces the room or the customer. The stand occupies an area of 19-3/4" × 19-3/4" (50.2 × 50.2 cm). You can also put the corner unit at the end of a linear stand and use it as a corner turn itself. Details are in the Design and Concept and Modular Use blocks.
Yes. I designed the corner unit to the same system of measurements as the linear stand in the same family: the arm width is 6" (15.2 cm), and the shelf heights and holder profile are the same; when the end of the corner arm meets the end of the linear stand's shelf, the edges of the shelves line up on all three tiers. No part connects the units to one another; each unit stands on its own, and you place them side by side, back to back, or in a U or square layout. For example, two corner units side by side form a U-shaped area, four corner units side by side and back to back form a tiered table of about 39-1/2" × 39-1/2" (100.3 × 100.3 cm), and two corner units plus a linear stand form a U-shaped structure. I give the capacity per unit; in a combined layout, multiply by the number of units. Details are in the Modular Use block.
Please select a heading above to see the project details.
Other Display Stands Projects
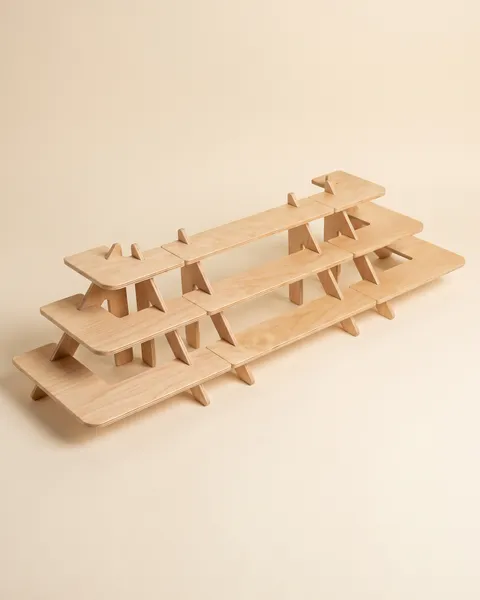
Modular 3-Tier Display Stand Plans Made Up of Straight and Corner Units
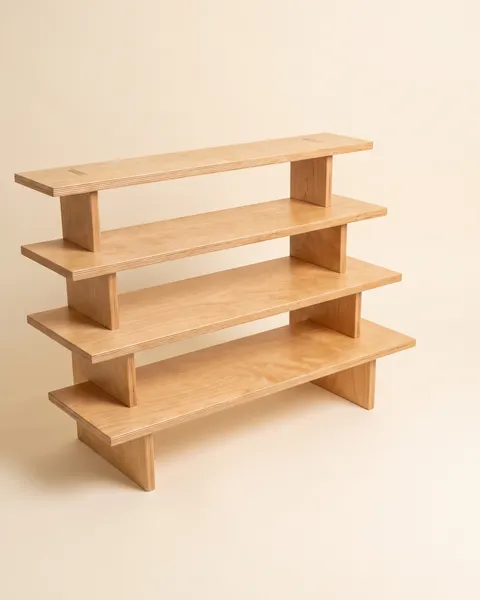
Rectangular 4-Tier Cupcake and Display Stand Plans (For Weddings and Birthdays)
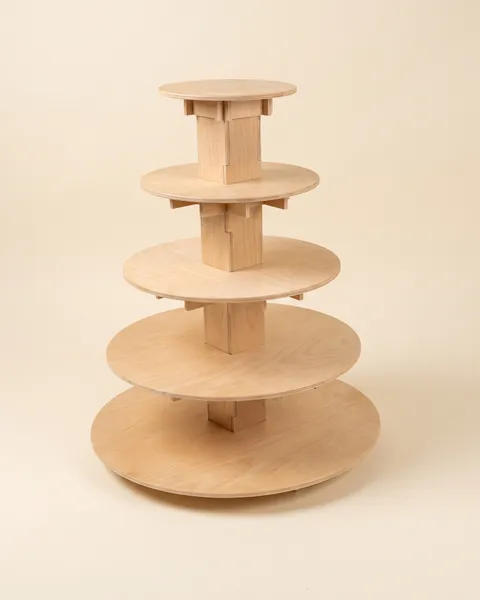
Elegant Round 5-Tier Cupcake and Display Stand Plans (For Weddings and Birthdays)
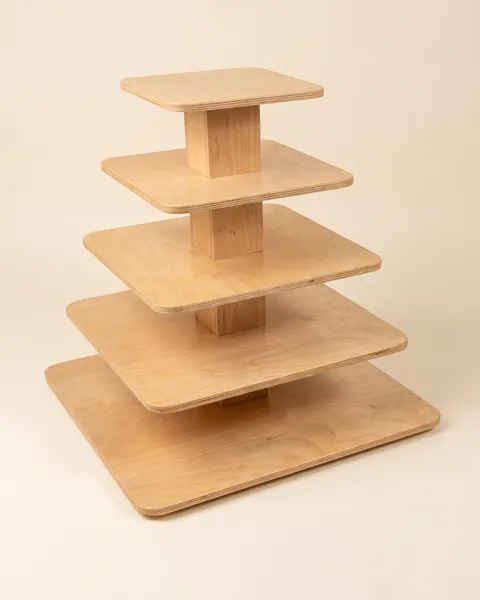
Elegant Square 5-Tier Cupcake and Display Stand Plans (For Weddings and Birthdays)
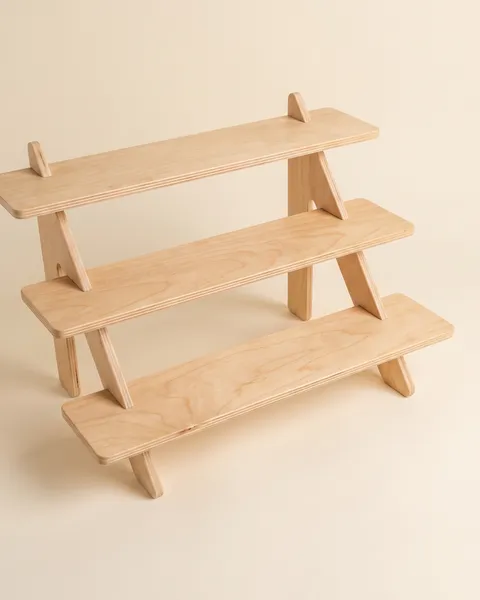
Straight-Lined, Modern-Looking 3-Tier Linear Display Stand Plans
Modular 3-Tier Display Stand Plans Made Up of Straight and Corner Units
Rectangular 4-Tier Cupcake and Display Stand Plans (For Weddings and Birthdays)
Elegant Round 5-Tier Cupcake and Display Stand Plans (For Weddings and Birthdays)
Elegant Square 5-Tier Cupcake and Display Stand Plans (For Weddings and Birthdays)