Project:
Elegant Square 5-Tier Cupcake and Display Stand Plans (For Weddings and Birthdays)
Package:
3 CNC Cut Files (SVG, DXF, DWG) + 1 PDF Guide
Laser/CNC-Ready Cut Files with a PDF Production Guide Covering Step-by-Step Assembly, Dimensions and Material Notes
What This Estimate Covers
Plywood Panel
1 sheet of 2×4 ft (61 × 122 cm) BCX sanded plywood, 11/32" (actual thickness 0.322" / 8.2 mm) — this estimate uses the economical grade the guide references; choosing birch plywood may raise the price.
Wood Glue
Water-based wood glue (PVA); this estimate uses Titebond II Premium Wood Glue, an 8 oz (237 mL) bottle, the product the guide references.
Thin Wire Nails
16 thin wire nails (8 for the bottom shelf, 8 optional for the top shelf) — a small pack is enough.
Finish (Varnish/Paint)
Water-based polyurethane varnish for a natural look, or water-based primer + acrylic furniture paint for a painted finish; 1/2–1 pint (250–500 mL) is enough for two coats. The price is approximate; it varies with can size and brand.
Sandpaper & Masking Tape
120 and 180–220 grit sandpaper and masking tape to cover the surfaces that will be glued; not included in the estimate because they are low-cost consumables.
Band Clamp (Optional)
An optional tool for tightening all four corners of the shelf holders at once; not included in the estimate because masking tape can do the same job.
CNC/Laser Cutting Labor
If you have the cutting done by a shop, labor pricing varies significantly between local providers, so it's not included in this estimate.
it was great to make
Jun 8, 2026 · Charles
I did the jigsaw method. Easy to read measurements and diagram to draw out your own pattern.
Feb 19, 2026 · chickpeastudios
Great product easy to use
Nov 29, 2025 · Luan
Great customer service, thank you Simeh!
Sep 1, 2025 · Christina
Excellent customer service thankyou for support with my order
May 21, 2025 · Jeanette H*
it was great to make
Jun 8, 2026 · Charles
I did the jigsaw method. Easy to read measurements and diagram to draw out your own pattern.
Feb 19, 2026 · chickpeastudios
Great product easy to use
Nov 29, 2025 · Luan
Great customer service, thank you Simeh!
Sep 1, 2025 · Christina
Excellent customer service thankyou for support with my order
May 21, 2025 · Jeanette H*
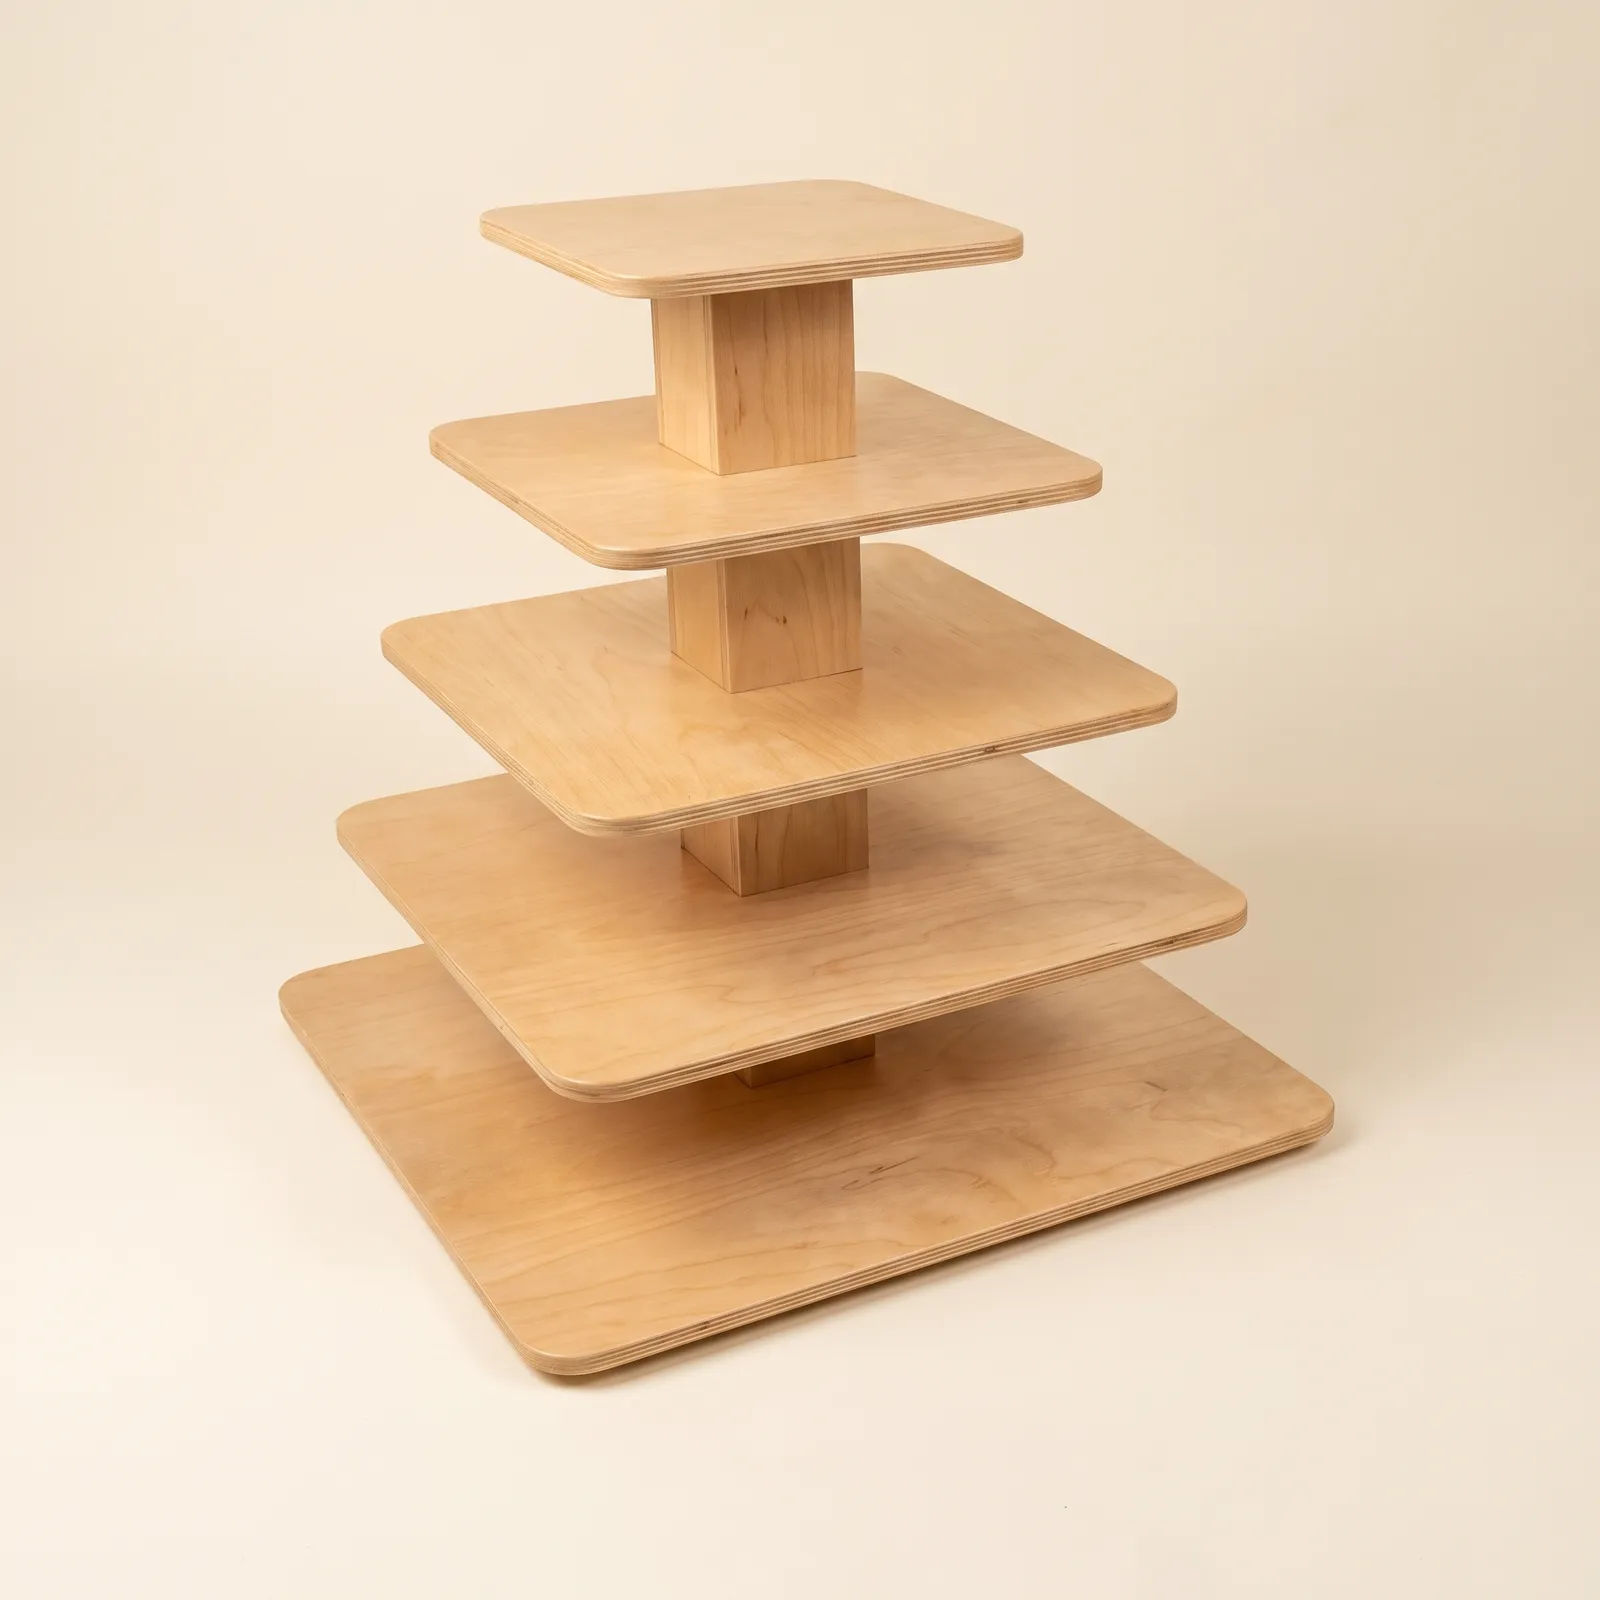
I designed this project so that a wedding, birthday, or engagement table can show off a lot of cupcakes, tier by tier, without giving up much table space. Five square shelves stack up a single square main post running through the center, narrowing from bottom to top; the stand sits on a 16" × 16" (40.6 × 40.6 cm) footprint and reads as a simple pyramid that tapers upward.
A multipurpose stand: I didn't design this stand for a single job. One day the same shelves carry cupcakes and light desserts on a celebration table, and another day they carry your products at your sales counter: jewelry, small gift items, candles, handmade soaps, and similar small handmade products can be arranged tier by tier, along with counter items such as business cards and price tags. On the square shelves the products sit in straight rows and the stand's edges sit parallel to the edge of the counter; five tiers also lift more variety above table level on a small counter area and bring it forward. The shelves are 0.322" (8.2 mm) plywood; think of the stand not for heavy objects but for small, light products.
Why square shelves: Thanks to its corners, a square shelf offers about a quarter more surface than a round shelf of the same width. The cupcakes line up in straight rows, and because the stand's edges run parallel to the table edge, no corners of the table layout are wasted. I rounded the corners to a 1" (2.5 cm) radius; compared with a sharp plywood corner, it doesn't dig into your hand and it chips less when knocked.
Why 5 tiers: Adding tiers is how you move surface upward without enlarging the base. Sitting on a 16" × 16" (40.6 × 40.6 cm) footprint, the stand offers about 4.84 sq ft (0.45 m²) of total shelf surface across its five tiers; that's roughly 2.7 times the table area it occupies. There is 3-11/16" (9.4 cm) of clear height between the shelves, so you need to choose your cupcakes to fit that height; the details are in the Capacity and Layout block.
How it stays up: The main post is a hollow square box section in which four thin strips interlock through joints; it resists bending and twisting far better than a solid stick made of the same material. Each shelf rests on a square holder that sits on the shelf below; the load travels down through these holders, tier by tier, to the bottom shelf and from there to the table. Because the hole in the middle of the shelves is square too, the shelves can't rotate around the post; every tier ends up facing the same direction on its own.
All the parts come out of a single 2×4 ft (61 × 122 cm) sheet of plywood, and the structure is joined only with wood glue and up to 16 thin nails; there are no screws. The top shelf has no hole and caps the end of the post, so the inside of the post can't be seen from above.
Finished, the structure has a 16" × 16" (40.6 × 40.6 cm) base and a total height of 16-5/16" (41.4 cm).
The listing and the guide give the height as 16" (40.6 cm). That measurement runs from the floor to the underside of the top shelf; the shelf's own thickness, 0.322" (8.2 mm), comes on top of it. If you're planning to fit the stand under a shelf or cabinet, work with 16-5/16" (41.4 cm).
Shelf side lengths, bottom to top:
- 1st shelf (bottom): 16" (40.6 cm)
- 2nd shelf: 13-1/2" (34.3 cm)
- 3rd shelf: 11-1/2" (29.2 cm)
- 4th shelf: 9-1/2" (24.1 cm)
- 5th shelf (top): 7-1/2" (19.1 cm)
All the shelves have corners rounded to a 1" (2.5 cm) radius. The first four shelves have a 2" × 2" (5.1 × 5.1 cm) square hole dead center, where the main post passes through; the 5th shelf has no hole.
The shelves are spaced on 4" (10.2 cm) centers; subtract the shelf thickness and 3-11/16" (9.4 cm) of clear height is left between two shelves. The main post is a hollow square box section with an outside dimension of 2" × 2" (5.1 × 5.1 cm).
Together, the five shelves have roughly 4.84 sq ft (0.45 m²) of surface once the center holes are subtracted. More than a third of that is on the bottom shelf; each shelf above it is noticeably smaller than the one before.
Capacity: When the whole stand is filled with a single size of cupcake, it holds about 410 mini, 90 standard, or 70 large cupcakes. I calculated these figures by placing the cupcakes one by one on the actual dimensions of each shelf. I defined the sizes by the cupcake's bottom and top diameter:
- Mini: bottom diameter 3/4" (1.9 cm), top diameter 1-1/4" (3.2 cm)
- Standard: bottom diameter 2" (5.1 cm), top diameter 2-1/2" (6.4 cm)
- Large: bottom diameter 2" (5.1 cm), top diameter 3" (7.6 cm)
You can measure your own cupcake with its liner to see which class it falls into. The numbers are approximate; the count that fits changes with the diameter of the cupcake liner and how tightly you space them.
As a sales display: The same shelves also work as a display stand when selling products. You can arrange small products such as jewelry, small gift items, candles, and handmade soaps tier by tier in the straight rows of the square shelves, and place your business cards or price tags next to the products or on the top shelf. The limits that apply to cupcakes apply here too: products you put on shelves 1–4 must fit under the shelf above, in 3-11/16" (9.4 cm) of clear height, and no product fits in the 2-5/8" × 2-5/8" (6.7 × 6.7 cm) holder area in the middle of these shelves; set a taller piece aside for the top shelf. Don't put heavy objects on the stand; put the weight on the lower tiers, not the upper ones.
Check the height of your cupcakes before you set up the table. Each shelf covers the one below almost completely: the outer strip left exposed is 1-1/4" (3.2 cm) on the 1st shelf and 1" (2.5 cm) on the other tiers, and that's narrow for a cupcake. So every cupcake you put on shelves 1–4 has to fit under the shelf above, in 3-11/16" (9.4 cm) of clear height; the 5th shelf at the top is the only open tier. If you're using cupcakes with tall frosting, measure one with its liner; set any that don't fit aside for the top tier.
My layout suggestions:
- Give the fullest arrangement to the lower tiers. The widest shelves already hold the most; keeping the weight low also helps the stand's balance.
- Account for the space the holder takes up. In the middle of shelves 1–4 sits a 2-5/8" × 2-5/8" (6.7 × 6.7 cm) square holder that carries the shelf above; no cupcakes fit in that area.
- The top shelf is your showcase. The 7-1/2" × 7-1/2" (19.1 × 19.1 cm) top shelf is the only tier with no height limit; you can display a few special pieces here, such as ones with name decorations, candles, or tall frosting. Don't put a heavy piece here; put it on the lower tiers.
- Don't put cupcakes directly on the wood; arrange them in their paper liners or on small serving plates (details in the Primer, Paint and Food Contact block).
The cupcakes on the lower tiers are picked up from the side, through the gap between shelves. For that reason I recommend choosing a spot where all four sides of the stand are reachable; on a table pushed against a wall, reaching the cupcakes at the back gets difficult.
3 CNC files in SVG, DXF, and DWG format: I provide the same cut package in three formats (SVG, DXF, DWG) so it can be opened with different programs. You don't need paid software to open them: LibreCAD (free, open-source) and QCAD (free community edition), both of which run on Windows and Mac, are enough; if you want a Windows-only option, Autodesk's free viewer DWG TrueView is available. If you're having the parts CNC- or laser-cut, you don't have to open the file yourself — you can hand it straight to the shop.
Check the scale when you first open the file: CAD programs can interpret a file's units differently. Confirm that the side of the bottom shelf shows as 16" (40.6 cm); if you see a different value, change the program's unit setting, or tell the shop that the bottom shelf must measure 16" (40.6 cm).
1 PDF production guide: An 11-page guide explained through drawings. It includes an exploded perspective diagram of the parts, a side section showing the shelf spacing, a top view of the shelves (hole and corner detail), the shelf holder parts and the 45° miter detail, a dimensioned drawing of the main post strips, a two-page assembly walkthrough, and a materials page.
I prepared the guide for A3; you can also print it scaled down to A4 or US Letter. Since every dimension is written out in numbers on the page, and the guide has no 1:1 scale template, scaling down doesn't spoil any measurement.
The guide has no separate cut list table or sheet layout page. The sheet layout is in the CNC file itself; I've given the full list of the 25 parts in the Panel Count and Cut List block in the Materials section. There's no printable template for hand-cutting on this project either: since every part is either a square with rounded corners or a rectangle, you can mark the dimensions directly on the sheet and cut.
What decides your material on this project isn't the wood species but the thickness. The joint slots in the main post strips, the shelf holes, and the inside dimension of the shelf holder were drawn for the actual thickness of the sheet I used as the reference in the guide, 0.322" (8.2 mm). When the thickness changes, the parts either won't fit together or sit loose.
Nominal versus actual thickness: The thickness on a plywood label and the sheet's real thickness are often different. The sheet in the guide is sold in the US under an "11/32 inch" (8.7 mm) label, but its actual thickness is 0.322" (8.2 mm). So trust the measurement, not the label: measure the sheet with calipers at several points before you buy it.
Recommended: plywood measuring 8–8.2 mm in actual thickness. I recommend two product groups:
- Birch plywood — Its plies are tight and free of gaps, so the cut edge comes out clean. Since all the shelf edges stay visible on this stand, it's my first choice if you want to leave it natural rather than paint it. Where plywood is sold by millimeter thickness (Europe and elsewhere), look for a sheet labeled 8 mm, and measure it anyway.
- BCX sanded plywood — This is the product I used as the reference on the guide's materials page: 11/32" × 2 × 4 ft (8.7 mm × 61 × 122 cm). The letters describe face quality: the front face is grade B and sanded, the back face is grade C; the X shows that the glue bonding the plies is a moisture-resistant grade. It's an economical and adequate option if you're going to paint.
In my own build: With a sheet measuring 8.2 mm, all the parts fit together without any sanding. If the thickness you measure falls within the 8–8.2 mm range, you can use the file as it is.
Avoid:
- 9 mm plywood. The post's outside dimension in one direction grows with the panel thickness; with a 9 mm sheet the post grows by about 1/16" (1.6 mm), and it won't pass through the 2" (5.1 cm) shelf hole or through the inside of the holder.
- 6 mm plywood. Because the joint slots are drawn for 8.2 mm, 6 mm strips sit loose in the slots with a gap of about 2 mm, and the post doesn't form a square box.
Whichever sheet you buy, dry-fit all the parts together before applying glue. If a hole or a holder fits tightly, sand its inside face lightly; don't force it, because thin panel cracks when forced. If the thickness you measure falls outside the 8–8.2 mm range, message me on Etsy before you start cutting; let's adapt the file together.
All the parts come out of a single 2×4 ft (61 × 122 cm) sheet. The reference sheet in the guide actually measures 23-3/4" × 47-3/4" (60.3 × 121.3 cm), with a thickness of 0.322" (8.2 mm). If you buy a larger sheet, a quarter of a 4×8 ft (122 × 244 cm) sheet is enough; the parts are laid out to fit an area of 23-3/4" × 47-3/4" (60.3 × 121.3 cm).
The layout is tight: about 85% of the sheet turns into parts. There isn't enough offcut left to recut a botched part from the same sheet; if you're cutting by hand, I recommend keeping a spare piece of sheet on hand.
The 25 parts in the cut file:
- Shelves (5): squares with sides of 16" (40.6 cm), 13-1/2" (34.3 cm), 11-1/2" (29.2 cm), 9-1/2" (24.1 cm), and 7-1/2" (19.1 cm); corners rounded to a 1" (2.5 cm) radius. The first four have a 2" × 2" (5.1 × 5.1 cm) hole in the middle; the top one has none.
- Main post strip, type A (2): 2" × 16" (5.1 × 40.6 cm). Wide, 2" (5.1 cm), and narrow, 1-3/8" (3.5 cm), sections alternate along their edges. Starting from one end: a 1-3/4" (4.4 cm) wide section, then four sections 3" (7.6 cm) long (narrow, wide, narrow, wide), and finally a 2-1/4" (5.7 cm) narrow section.
- Main post strip, type B (2): the same size, with a pattern that complements A. Starting from one end: a 2-1/4" (5.7 cm) wide section, then four sections 3" (7.6 cm) long (narrow, wide, narrow, wide), and finally a 1-3/4" (4.4 cm) narrow section.
- Shelf holder parts (16): 2-5/8" × 3-11/16" (6.7 × 9.4 cm) rectangles; four parts join to form each of the 4 square holders.
After cutting the post strips, mark them A and B in pencil. The four strips look identical at first glance, but the joints only seat when A and B are side by side.
No screws. I deliberately didn't use screws in this project: a screw driven into the edge of a 0.322" (8.2 mm) panel cracks it. The structure is carried by the glued joints and by the shelf holders stacked one on top of the next; the nails only reinforce a few connections.
Glue: Water-based wood glue (PVA). The product I used as the reference on the guide's materials page is Titebond II Premium Wood Glue, an 8 oz (237 mL) bottle. Glue goes on the joints of the main post strips, the mitered corners of the holders, and the surfaces where the shelves seat on the holders.
Nails: 16 thin wire nails (also sold as brad nails). 8 of them fasten the bottom shelf to the first holder from underneath; the other 8 are optional, for fastening the top shelf from above. The guide doesn't give a nail length: choose a nail long enough to go through the shelf and bite into the wall of the holder, but with a shank thin enough not to split the holder's 0.322" (8.2 mm) wall. A thick-shanked nail has the same effect on thin panel as a screw.
Clamps: Needed to hold the parts tight while the glue dries.
- Band clamp for the shelf holders — also called a strap clamp. It tightens all four corners of the square box at once with a single strap, which makes it the most useful tool for mitered joints. If you don't have one, wrapping the corners tightly with masking tape and leaving it until the glue dries also works.
- 2–3 bar clamps for the main post — also called F-clamps. They squeeze the 16" (40.6 cm) post evenly along its length.
Leave the parts clamped until the glue sets; for the time, check the clamp time on the glue's packaging. The guide recommends leaving the main post clamped for a few hours.
This is an indoor tabletop stand; it doesn't need exterior paint or weather resistance. Two matters stand out here: the surfaces the glue will bond to, and contact with food.
Don't paint the surfaces that will be glued. Wood glue bonds to bare wood, not to a layer of paint or varnish. Before painting, cover these surfaces with masking tape: the joint surfaces of the main post strips, the inside edges of the shelf holes, the mitered corners of the holders, the square area on the top and bottom face of each shelf where the holder will sit, the outside face of the main post, and the inside faces of the holders. The last two pass through the shelf holes and the inside of the holders with zero clearance; the thickness of the paint there can make the parts bind. These surfaces aren't visible after assembly anyway. I recommend painting before assembly, while the parts are still separate; with only 3-11/16" (9.4 cm) of space between the shelves, reaching everywhere with a brush after assembly is hard. Remove the tape after the paint has dried, just before you glue each part.
Natural wood look: Water-based polyurethane varnish protects pale wood like birch without yellowing it. Two thin coats in a matte or satin sheen is enough; go over it lightly with 220 grit between coats.
Painted finish: A water-based wood primer, then a water-based acrylic furniture paint on top — on labels this is sold as furniture paint, acrylic enamel, or cabinet paint. Don't use wall paint; it stays soft on a furniture surface and takes marks as plates and paper liners are set down and lifted off.
Quantity: Adding up both faces and the edges of all the parts, the surface to be painted is about 14–15 sq ft (1.3–1.4 m²). A small can of paint or varnish, between 1/2 and 1 pint (250–500 mL), is enough for two coats; since plywood soaks up the first coat more, don't count on the lower end, and check against the coverage figure printed on the label.
Food contact: Whether wood is suitable for direct contact with food depends on the sheet itself and on the product you put on it; I'm not making a firm ruling on that. Here is what I recommend:
- Arrange cupcakes in their paper liners or on small serving plates; don't put frosted items directly on the wood surface.
- For paint or varnish, choose a product that is labeled as suitable for food contact ("food safe" or "food contact").
- Don't settle for the surface feeling dry to the touch; wait for the full cure time stated on the label, and only then use the stand with food.
There are two ways to build this project, and which one you choose depends on what you have access to.
- CNC / laser cutting — Hand the SVG, DXF, or DWG file from the package to a CNC or laser shop. All 25 parts come out with the same precision; the joint steps on the main post strips and the shelf holes in particular are cut to the most accurate dimensions this way. If you're having it laser-cut, ask the shop beforehand whether its machine can cut 8 mm plywood cleanly.
- Cutting by hand with a jigsaw — Draw the dimensions from the guide and the cut list on this page onto the sheet yourself and cut them out. Since every part is a square with rounded corners or a rectangle, there's no complex silhouette to follow.
Three notes if you're cutting by hand:
- Shelf corners: Draw the 1" (2.5 cm) radius corner with a compass, or by using a round lid 2" (5.1 cm) in diameter as a template.
- Shelf holes: Drill a small hole inside the hole area, near a corner, then feed the jigsaw blade through it and cut the edges. The hole is 2" × 2" (5.1 × 5.1 cm) and was designed to seat on the post with no gap; cut the hole right up to the line, then bring it to final size by sanding, test-fitting it against the post.
- Main post strips: These are the parts that need the most care. The joint steps are as deep as the panel thickness and are spaced 3" (7.6 cm) apart; a small error here spoils the post's squareness. On straight cuts, run the jigsaw against a straightedge batten.
The 45° miter cut that the shelf holder parts need is a separate job with either option; I cover it in the next block.
The four topics below are the ones that are hard to fix once the parts are cut. Read them before you start cutting, before you send the file to a shop.
1. The 45° miter isn't in the cut file. The 16 shelf holder parts are in the cut file as straight-edged 2-5/8" × 3-11/16" (6.7 × 9.4 cm) rectangles; CNC and laser cut square to the panel. Each part needs a 45° miter on its two long edges, that is, its 3-11/16" (9.4 cm) edges. Either make this cut yourself with a circular saw, or ask the shop for it separately. The miter is cut so that the outer face of the part stays 2-5/8" (6.7 cm); the inner face ends up about 2" (5.1 cm), and the post sits in that inner opening.
2. Measure your sheet before cutting. The joints were drawn for a thickness of 0.322" (8.2 mm). If you're taking your own sheet to the shop, measure its thickness with calipers and make sure it falls within the 8–8.2 mm range; if you'll use the shop's sheet, tell them the thickness explicitly. What happens with 9 mm and 6 mm sheets is covered in the Material Choice and Panel Thickness block.
3. Check the scale. The program that opens the file may interpret its units differently. Before cutting, confirm together with the shop that the side of the bottom shelf is 16" (40.6 cm).
4. Leave the kerf allowance on the correct side. A router bit or a laser beam removes some material over the line. Remind the shop that the inner contours (shelf holes) should be cut on the inside of the line, and the outer contours (shelves, post strips, holder parts) on the outside of the line. A hole cut from the wrong side grows, a part shrinks, and the joints go loose.
One more thing: the top shelf has no hole. The cut file already supplies it that way, but if you're cutting by hand, don't drill a hole in the 5th shelf; that shelf caps the top of the post.
Each of the four shelf holders is a square box, open at the top and bottom, formed by joining four mitered parts. The holders both carry the shelf above and set the 3-11/16" (9.4 cm) distance between the shelves; for that reason all four must be the same height, with square corners.
If you're painting before assembly (see the Primer, Paint and Food Contact block), start assembling only after the paint has dried completely. Remove the masking tape just before you glue each part; the bare wood surfaces under the tape are where the glue will grip.
- Dry fit — Bring the four parts together without glue, with their mitered edges meeting. There should be no gaps at the corners.
- Glue and clamp — Spread a thin coat of glue on the mitered edges, assemble the box, and tighten it with the band clamp. Wipe off squeezed-out glue immediately with a damp cloth; a bead of glue that dries on the inside face will stop the holder from slipping onto the post.
- Miter check — Measure the box's two diagonals; if they're equal, the corners are square. Stand the holder on a flat surface and check that the top and bottom edges of the four parts are in the same plane; if one part sits high, the shelf on top will lift off at that corner.
- Waiting — Don't remove the clamp until the glue has set, and don't move the holder; for the time, check the clamp time on the glue's packaging.
The inside dimension of the holder is almost the same as the post's 2" (5.1 cm) outside dimension. Once the glue has dried and the post is ready, dry-fit each holder onto the post. If it feels tight, open up the inside face lightly with sandpaper; don't drive the holder onto the post with a hammer.
The main post is a square box, 2" × 2" (5.1 × 5.1 cm) on the outside and about 1-3/8" (3.5 cm) hollow on the inside, in which four strips interlock through joints along their edges. The wide sections of one strip seat into the narrow sections of the neighboring strip; at the corners this produces a toothed joint resembling a box joint (also called a finger joint). It isn't screws that hold this joint but the glue and the full-length gluing surface of the joints.
Order of the strips: Lay out the four strips to form a square in A, B, A, B order; the two opposite strips are A and the other two are B. For the joints to complement one another, the 1-3/4" (4.4 cm) sections of all four strips must be at the same end: at that end, A's wide section sits next to B's narrow section. This end can be at the bottom or at the top; since none of the joint boundaries land at shelf level, the structure doesn't change.
Dry-assemble the four strips before applying glue. If all the steps close without gaps, the arrangement is correct; if a step collides with a step somewhere, one of the strips is reversed or the wrong type.
- Glue — Spread a thin coat of glue on the joint surfaces; there are no screws in this joint, the glue holds the post.
- Clamping — Clamp the post evenly along its length with the bar clamps.
- Cleanup — Wipe squeezed-out glue off the outer faces before it dries. The post must pass through the 2" (5.1 cm) shelf holes and the inside of the holders without a gap; a dried glue mark on the outer face prevents this.
- Check — Before the glue sets, lay the post on a flat surface and check its four corners with a square. The wait time in the guide is a few hours; once the glue has dried, test-fit a shelf hole by passing it over the end of the post.
Because the square holes lock the shelves to the post, a slight twist in the post shows up as a visible rotation on the top shelf relative to the bottom one. Assemble the post on a flat bench.
Assembly proceeds from the bottom up, and each shelf is tied to the next shelf by a holder. Before you start, the post and holders should be ready and all the parts should have been through a dry fit. If you painted before assembly (see the Primer, Paint and Food Contact block), also remove the tape from the square area of each shelf where the holder sits, just before you glue that shelf.
- First holder — Hold the post upright. Slide the first holder down over the post from the top, and leave a gap at the bottom end of the post equal to one shelf thickness, 0.322" (8.2 mm).
- Bottom shelf — Pass the 1st shelf up from the bottom end of the post into this gap. Apply glue to the surfaces of the shelf that touch the holder and the post. The underside of the shelf should stay flush with the bottom end of the post so that the stand sits flat on the table.
- Nails — Turn the stand over and fasten the bottom shelf to the first holder from underneath with 8 thin nails; drive the nails around the hole, positioned to land in the holder's walls. The guide defines the bottom tier as the load-bearing tier; the nails reinforce this joint.
- Working upward — Apply glue to the top edge of the first holder, pass the 2nd shelf over the post from the top and lower it onto the holder, then slide the second holder over the post and seat it on the shelf. Place the 3rd and 4th shelves and their holders in the same order.
- Top shelf — Seat the 5th shelf, which has no hole, onto the top end of the post and the last holder, gluing it in place. If you want a stronger connection, you can fasten the shelf from above with 8 thin nails, lining the nails up with the walls of the holder below.
After each shelf, check that the shelf is level and that the holder sits fully on the shelf below. If a gap is left between a shelf and a holder, or a holder lifts at one corner, the upper tiers will sit crooked, and this can't be corrected after the glue dries. Once all the tiers are in place, set a light, flat weight on the top shelf and wait for the glue to dry.
Sand after cutting, before assembly. The shelf edges and rounded corners are the surfaces that stand out most once the stand is finished; on the edges, start with 120 grit and finish with 180–220 grit. On the wide flat faces an orbital sander speeds up the job; on the 1" (2.5 cm) radius corners, sanding by hand gives a more controlled result.
Ease the edges lightly: Soften the sharp edge of the shelves with a sanding block in a pass or two. That way the plywood edge splinters less and the cupcake liners don't catch on the edge.
Don't round over the joint surfaces or the insides of the holes. The outer face of the post, the inside edges of the shelf holes, and the inside faces of the holders are designed to seat against each other with no gap. Here, use sandpaper only where the dry fit felt tight, with a flat block and a little at a time; material that's been removed doesn't come back.
The layered lines on the cut edge of the plywood stay visible if you don't paint the edge; on birch plywood these lines are fine and even, so the edge can be left natural. The sequence I recommend: sand → dry fit → mask the glue surfaces with tape → primer and paint or varnish → remove the tape just before gluing, once the paint has dried → assembly. The paint and varnish choice is covered in the Primer, Paint and Food Contact block.
This stand's stability comes from its geometry. The guide doesn't give a load limit, so I'm not going to give you a weight rating; instead I'll explain how the stand stays balanced and what you should watch for.
The base is almost as wide as the stand is tall. A 16" × 16" (40.6 × 40.6 cm) base carries a height of 16-5/16" (41.4 cm); this isn't a tall, narrow tower but a square-based structure that narrows toward the top.
The weight gathers low. The shelves shrink going up; the top shelf's area is about 22% of the bottom shelf's. With most of the cupcakes arranged on the lower tiers, the center of gravity stays close to the base.
Even so, here is what you should watch for:
- A flat, solid surface: Set the stand up on a flat table. A thick, soft tablecloth or a folded piece of fabric can sink one corner of the base, and the stand leans that way; if you use a cloth, make it flat and taut.
- Heavy items not on the upper tier: The top shelf is for small, light display pieces. Don't put heavy items such as a cake, a bottle, or a full bowl on the top tier; the higher the weight, the more easily the stand tips over.
- Away from the table edge: Don't place the stand at a table edge where guests might bump it as they pass; set it at least a hand's width in from the edge.
- Children: The cupcakes on the lower tiers are at a height small children can reach; if a child hangs on a side of the stand, it can tip over. At a birthday party with a lot of children, keep the stand in your sight.
- Don't carry it loaded: Set the stand in place empty, then arrange the cupcakes on it where it stands.
Cleaning: Wipe with a damp, well-wrung cloth, then dry with a dry cloth. Don't soak the stand in water, wash it under the tap, or put it in the dishwasher; neither plywood nor wood glue tolerates staying wet for long, and the plies can swell and the joints can loosen. Wipe off frosting or sugar stains before they dry; a varnished or painted surface cleans more easily than bare wood.
Transport: I designed the stand as a glued, single-piece structure; it was not designed to be taken apart and reassembled. Its outside dimensions for transport are 16" × 16" × 16-5/16" (40.6 × 40.6 × 41.4 cm); a cardboard box of that size or a flat spot in a car trunk is enough. Carry the stand empty and lift it by gripping the bottom shelf with both hands; lifting it by the upper shelves puts the entire weight on that shelf's joint. Lay a non-slip mat under it in the car so it doesn't slide, and protect the shelf edges with a blanket.
Storage: Store it in a dry place, away from heat sources such as a radiator or direct sunlight; thin plywood can move slightly as moisture and temperature change. Don't put weight on top of it; keep it under a cover or in its box so it doesn't collect dust.
This stand is a load-bearing structure, so changing the size isn't just a matter of scaling the file up or down. Rescaling the CNC files in CAD software is technically possible, but the joint gaps in the main post strips and the inside dimension of the shelf holders are sized to the panel thickness, 0.322" (8.2 mm). If you scale the file up or down proportionally, those gaps change too, but your sheet's thickness stays the same; the joints either go loose or the parts won't fit together. If you want a different size, message me on Etsy before changing the scale; let's work out together which measurements need to stay fixed.
Yes — this is a standard, platform-wide Etsy feature. The download link doesn't expire; you can re-access your files anytime from the "Purchases and Reviews" page in your Etsy account, with no limit on how many times you download.
Of course — I make every plan myself, and you're welcome to reach out to me directly through Etsy with any question, before or after your purchase. I stand behind every design I share.
No — these files are for personal use only. Selling what you make from them, or using the design or files for any other commercial purpose, isn't included in this purchase.
I don't offer refunds once the files have been downloaded — this is standard practice given the nature of digital goods. That said, if you run into an actual problem with the files (won't open, something's missing), reach out and I'll help sort it out.
I recommend a sheet that measures 8–8.2 mm in actual thickness. The joint slots in the cut file, the shelf hole, and the inside dimension of the shelf holder were drawn for a thickness of 0.322" (8.2 mm); in my own build, the parts fit together without sanding with an 8.2 mm sheet. Avoid 9 mm and 6 mm sheets: by my calculation, with a 9 mm sheet the post's outside dimension grows by about 1/16" (1.6 mm) and the post won't pass through the 2" (5.1 cm) shelf hole; with a 6 mm sheet, on the other hand, the strips sit loose in the joint slots with a gap of about 2 mm. Measure your sheet with calipers and dry-fit before applying glue; sand lightly anywhere that fits tightly. If the thickness you measure falls outside the 8–8.2 mm range, message me on Etsy before you start cutting; let's adapt the file together.
When the whole stand is filled with a single size of cupcake, it holds roughly 410 mini, 90 standard, or 70 large cupcakes. I calculated these figures by placing the cupcakes one by one on the actual dimensions of each shelf. I defined the sizes by bottom and top diameter: mini 3/4" (1.9 cm) bottom, 1-1/4" (3.2 cm) top; standard 2" (5.1 cm) bottom, 2-1/2" (6.4 cm) top; large 2" (5.1 cm) bottom, 3" (7.6 cm) top. The number varies with the diameter of the cupcake liner and how tightly you space them. There's one limit: the cupcakes on shelves 1–4 have to fit under the shelf above, in 3-11/16" (9.4 cm) of clear height; the 5th shelf on top is the only open tier. Details are in the Capacity and Layout block.
Yes. I designed this stand so that, alongside cupcakes and light desserts, it can also be used as a display stand when selling products: you can arrange small products such as jewelry, small gift items, candles, and handmade soaps, together with business cards and price tags, tier by tier in the straight rows of the square shelves. Don't put heavy objects on it, and make sure products on shelves 1–4 fit in 3-11/16" (9.4 cm) of clear height. Details are in the Capacity and Layout block.
I don't recommend it. I'm not making a firm ruling on direct food contact with the wood or with the paint or varnish you put on it; the safest way is to arrange the cupcakes in their paper liners or on small serving plates. If you're going to paint or varnish, choose a product whose label says it's suitable for food contact, and wait for the full cure time stated on the label. Details are in the Primer, Paint and Food Contact block.
Please select a heading above to see the project details.
Other Display Stands Projects
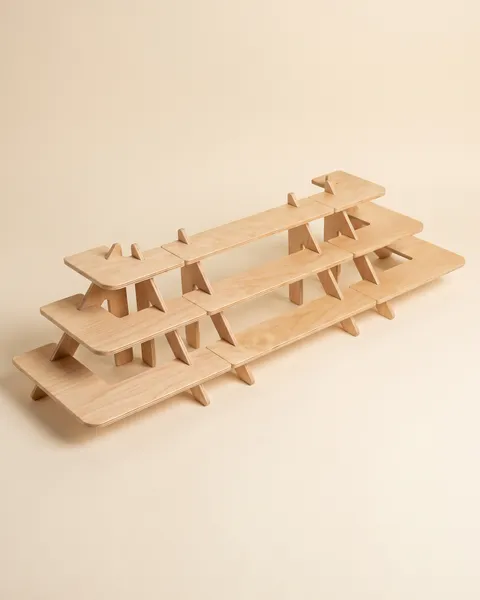
Modular 3-Tier Display Stand Plans Made Up of Straight and Corner Units
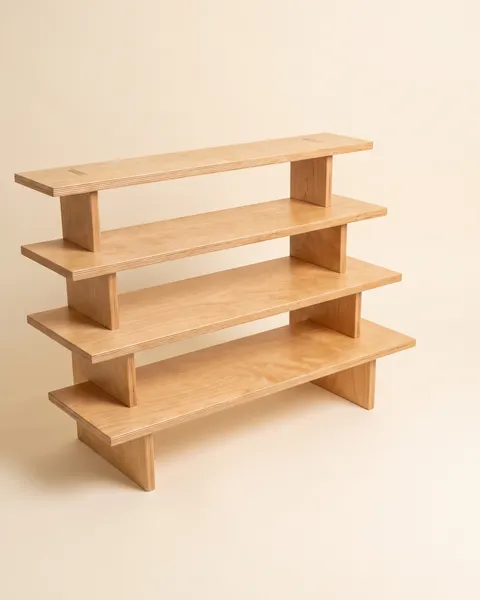
Rectangular 4-Tier Cupcake and Display Stand Plans (For Weddings and Birthdays)
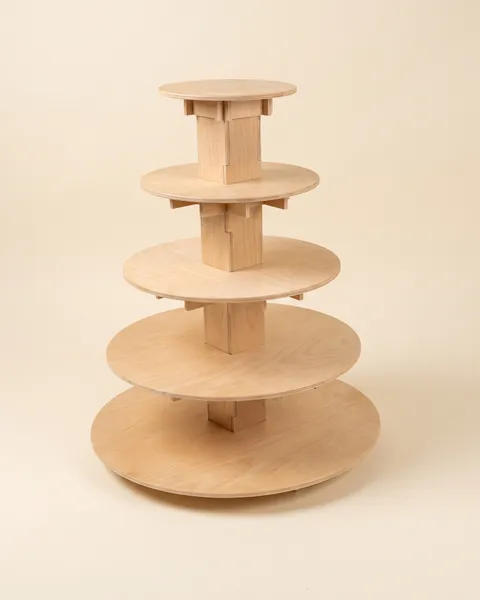
Elegant Round 5-Tier Cupcake and Display Stand Plans (For Weddings and Birthdays)
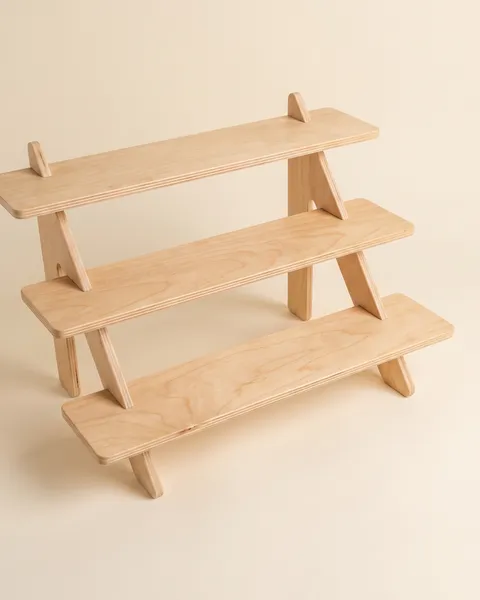
Straight-Lined, Modern-Looking 3-Tier Linear Display Stand Plans
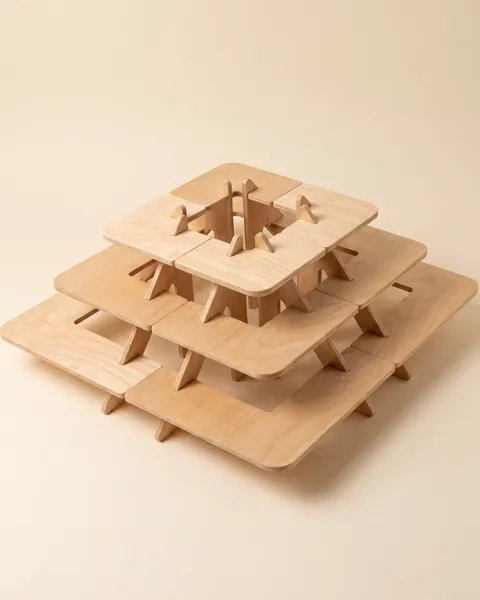
Corner-Fit Modular 3-Tier Display Stand Plans (Combinable with Linear Stands)
Modular 3-Tier Display Stand Plans Made Up of Straight and Corner Units
Rectangular 4-Tier Cupcake and Display Stand Plans (For Weddings and Birthdays)
Elegant Round 5-Tier Cupcake and Display Stand Plans (For Weddings and Birthdays)
Straight-Lined, Modern-Looking 3-Tier Linear Display Stand Plans